QuickBooks is one of the most popular accounting tools for small and medium-sized nonprofits. Since it's tailored to for-profit businesses, recording donations may not be intuitive when you're just getting started. This guide will walk you through how to record a cash or check donation, step by step.
Terminology Translations
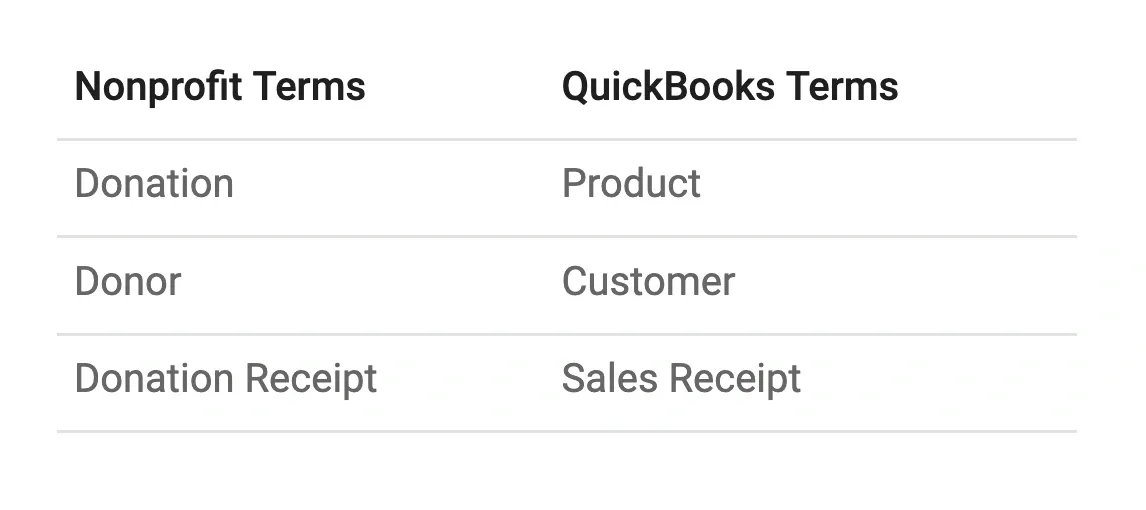
QuickBooks often uses for-profit terms that aren't intuitive for nonprofit organizations. Here’s a list that translates QuickBooks receipt terminology into its nonprofit equivalent.
Recording Cash or Cheque Donations
The following explains how to record a donation made by cash or checks.
Create a Sales ReceiptWhy use a sales receipt? There are two main reasons. First, a sales receipt is an easy way to record and categorize incoming funds for an organization.. Second, you'll likely want to provide your donor with a receipt for their donation, and QuickBooks includes this functionality in the sales receipt feature. I also have a post that shows how to customize your sales receipt to serve as a donation receipt.
Record a Donation
To record a donation, click the + New button and select Sales Receipt.
In the Customer field, start typing the donor's name. If the donor has contributed before, you can select their name from the list. If it's a new donor, click + Add New to enter their information, then click Save.
Next, choose the Payment Type: Cash or Check.
For Deposited to, you will probably want Undeposited Funds. This account temporarily holds cash and checks until they are deposited into your bank. If you are unsure which account to use, check with your bookkeeper or accountant.
Under Product/Service, either select an existing product or create a new one. In QuickBooks, create a new product for donations when you need to track a distinct type of donation separately from others, especially if it needs to be reported on uniquely. For example, if you receive general donations, restricted grants, and in-kind contributions, you may want to set up separate products for each to track them accurately and align with fund accounting principles. Each product can be mapped to a specific income account that reflects the nature of the funding, such as Restricted Donations or General Contributions. To avoid clutter, create new products only when there’s a specific need to differentiate income streams—typically, one product per income account or per type of donation category is sufficient. Having well-defined products helps streamline donation tracking and reporting. See Donations are Products in QuickBooks: How To Set Them Up, for further details.
Enter the donation amount for the transaction.
It's time to Save the receipt. You have three options:
Save and Send will walk you through emailing the receipt to the donor.
Save and New will save the receipt and open a new one, allowing you to input the next donation.
Save and Close saves the receipt and closes the form.
That’s it! You’ve successfully recorded the donation.
TLDR;QuickBooks automatically performs some actions when you create a sales receipt. To see what happens behind the scenes, click the More link at the bottom of your sales receipt and select Transaction Journal. This will show the accounting details of what QuickBooks did. Specifically, you'll notice that Undeposited Funds is debited (increased), and Unrestricted Contributions is credited (increased).It may seem odd that a debit increases an account, but you won't need to understand this if your job is just entering donations. However, if you are curious, it's because QuickBooks uses double-entry bookkeeping, where debits and credits don’t always align with everyday expectations. Here’s an explanation of how to overcome debit and credit confusion.
Recording donations in QuickBooks can seem complex at first, but with the steps outlined here, it becomes a simple process. By following these instructions, you'll easily track cash or check donations, provide donors with receipts, and maintain accurate records for your nonprofit!